Never the right time, gear, light or place but never say no!
- At May 10, 2012
- By thomasjupe
- In General, New Uploads, Photo Project, Photo Shoot, Uncategorized
1
One of the things I have some across as a travelling photographer is that as soon as people find out your a photographer they would love it if you could just take some photos of this and that.
My reaction to this has always been to cringe, my mind racing to the gear I don’t have, the poor light or a million other excuses. This is all part of why people need a professional photographer to take their images for them and why we always get better results.

This precise scenario arose recently with a friend wanting some images of the great food produced by their kitchens to promote their restaurant. Food photography is well known as quite a difficult area of photography to get right.
The gear I had was just my SLR and flash gun. Not the ideal setup and with the images to be shot in the kitchens themselves, during a busy food service just before the food went out to the diners, the pressure was going to be on!

Overall I was really pleased with the images I produced, especially as I had no time for prep and considering that in a normal commercial arrangement I would have insisted on completely different conditions for the shoot.
Related articles
- Plate to Pixel: Digital Food Photography and Styling (texaskitchen.wordpress.com)
- Best Food Photography (detectiveswearglasses.wordpress.com)
- Bad Restaurant Food Photography – Brooklyn Edition (coedmagazine.com)
- Food Photography (photographyfraud.wordpress.com)
- Why is food photography so expensive? (foodservicewarehouse.com)
A quick Snap!
- At May 10, 2012
- By thomasjupe
- In General, New Uploads, Travel, Uncategorized
0
Sometimes the best joke is the worst one …
Alamy QC Workflow from camera to upload
Over the last couple of weeks I have been uploading the images that I have been shooting over the last few months of my travels around Australia to the Alamy Stock Library.
I thought that in this post I could share my workflow from loading the images from my camera to my computer and all the way through to the upload to Alamy. This includes the process to edit the images so that they are ready for Alamy’s stringent quality control.
Most of my photographs are shot with my Canon 5d Mk2 shooting using its RAW format. To process the images I use my MacBook Pro with Aperture 3 and to do the final edit the images Photoshop CS3.
First of all I need to get the images from the camera to my computer, at the same time I add my IPTC Metadata and keywords. To do this I connect the camera via USB cable to my Mac and open Aperture. When Aperture loads I select the import option on the top left of the application. This opens up the import interface and I can select all the photos I wish to import. When the images are selected I can then use the import settings menu on the right hand side. I have set up my Aperture so that all my Australia Images have their own library and each shoot has its own project. This import will go in as a new project. I enter all the information including the caption and keywords, which will correspond with Alamy’s caption and keywords. Having pressed the import button it is generally time to hit the button on the kettle and make a brew whilst Aperture imports and processes all its thumbs and the metadata.
The next stage whittles down the images until I have the images ready to export. To do this I use Aperture’s star rating. My first sweep through the images is the first star sweep. All images that I want to keep get one star. On my first sweep I am only looking at getting rid of only obvious no goers, ie. out of focus, poor exposures or accidental exposures. (of course I never normally have any of these!) The second sweep through the images I do in full screen mode and I only two star the images I definitely want to send to Alamy.

Third star sweep leaves only the images I want to send to client, or in this case Alamy.
The third sweep through is for editing. All the two star images are checked so the exposures are aesthetically correct, cropped and the white balance is spot on. At this stage it is also a good idea to have another look at your keywords and add any others you wish to add to individual images. I then export the images as Jpegs at original size to a folder on my desktop. Its now time to do an in-depth edit with Photoshop.

Exporting from Aperture, Jpeg original size, Don’t forget to add a custom file name, I always add the master file name also for future reference.
When the files have opened in Photoshop the first thing I do is check the levels. When the levels box opens I use the histogram and pull in the edges so that the sliders are in to where the histogram shows data. If there is a significant change to the image I then use curves to make it aesthetically correct. The next thing I sort is the image size.
In finder some of my cropped images show up as 16mb on disk which is below Alamy’s 17MB minimum for upscaling but this is a compressed size. To get the true size go to image size in photoshop and it will tell you the true image size. Alamy’s minimum file size is 24MB but you can upscale a 17MB file up to 24MB. Normally my camera punches in at around 60MB with an image size of 5700×4000. Alamy thinks that the bigger the better and are happy to accept files as big as your camera can make and if I were sending in the images on DVD I would probably send in the images at full res but as I upload my images I reduce the image size to 4000×2667 which gives me a file size of 30.5MB which uploads a lot quicker!
All is not complete though and the next stage is crucial – you have to inspect your image now closely for any imperfections. Zoom all the way in to 100% and scroll across the entire image carefully looking for any imperfections. Some people find it easier to increase the contrast in the image for this step to make the imperfections show up clearer but I rarely do so. Imperfections normally come from dust on the lens or sensor or alternatively from digital noise, I then check that the colour profile is still set to RGB colour save and close the file. I then get online and upload the file to Alamy.

ALWAYS zoom in to 100% and check you image for any imperfections which may occur anywhere on your image
To see my Australian Stock Images on Alamy visit my Alamy Homepage.
Project: Bicycle
- At February 10, 2012
- By thomasjupe
- In Photo Project, Uncategorized
0

Breaking a long silence on my blog with a series of images I took last week. These bicycles I found up on the range above Mclaren Vale in South Australia. Beautiful.
Wilsons Promontory – Our new temporary home – Victoria Parks
- At February 17, 2011
- By thomasjupe
- In General, New Uploads, Photo Shoot, Travel
4
Wilsons Promontory National Park has become our new base camp down by Tidal River. We are helping out at the outdoor cinema here which puts on showings of latest releases twice a week on its open air screen.
Driving into Wilsons Promontory was breathtaking, the roads twist and turn through beautiful scenery with colourful birds and other wildlife including wombats, kangaroos and emus.
Wilsons Promontory is huge over 36 km from its most northern to southern points. About four hours drive SE from Melbourne it is truly a magnificent place.
On our second day here Emily and I walked north up the coast from Tidal River camping ground all the way up to Whiskey Bay before hitching a lift back to camp from a nice couple from Melbourne.
The pictures say a lot but these and words definitely cannot describe how beautiful this place really is.
Tooradin Overnight Stop – Victoria – Australia
- At February 17, 2011
- By thomasjupe
- In General, New Uploads, Travel
0
We were fortunate to find Tooradin, a little town on the map with not much in it save a petrol station and a couple of shops and cafes. According to our trusty, if not slightly out of date, Camps 4 guide and map there would be somewhere to have a quick shower and use the ‘facilities’ before heading down the road to the Swamp Tower Reserve in Koo-wee-rup observation tower where we could sleep for the night.
Little did we know Tooradin had so much more to offer us! It became apparent that a couple of other campers were in the overspill carpark by the boat launch and looked pretty settled in. Upon conversing with an amicable elderly chap in a motorhome it became apparent that the warden didn’t mind people stopping overnight. After inspecting the gates that were so overgrown and rusted open I decided, using my powers of deduction that the elderly chap was probably right.
Tooradin has plenty of facilities with BBQ areas, boat launching facilities, showers, toilets and best of all beauty.
As the sun went down I grabbed my camera and shot away happily preserving the moment. I even had a quick visit from a wild pelican down on beach but it turned out he was more interested in a young lad using the sinks at the top of the beach to gut his days catch!
The next morning I found an honesty box and deposited most of the change that I had been hauling around Melbourne in my back pocket for the last couple of days!
St. Kilda Sunset – Melbourne – Victoria
- At February 17, 2011
- By thomasjupe
- In General, New Uploads, Photo Shoot, Travel
0
Having left Phillip Island Emily and I decided to head to the Melbourne area for a couple of days. Emily wanted to visit the Victoria Market, which was vast and one of the best markets I have seen, well worth a visit. Obviously my desire to revisit at a more sedate pace was fuelled by my wanting to get some photos of Melbourne itself.
We decided to stop overnight just outside of Melbourne in St. Kilda where we knew backpackers tended to congregate and where we first met Dori our campervan.
The sunset that evening was second to none and as the sun slipped down below the horizon I stepped out of our camper and shot the views.
Emily and I then walked along St. Kilda Pier to the end where penguins sometimes nestin the wharf’s walls. Due to excessive amounts of tourists crowding these little creatures (including ourselves!) flash photography was strictly prohibited but I found the best shot was back across from where we had come.
Looking out through the boats in the harbour you could see the lights turning on asMelbourne’s nightlife took off and it made for a glorious cityscape.
All the photos from the evening are below and the pictures are linked to larger versions which you can view by clicking on them.
Sun setting from St. Kilda Beach looking out to St. Kilda Pier from where we parked upfor the evening. Walking up St. Kilda Pier View from St. Kilda Pier looking back towards Melbourne City in the evening light Panorama looking back to Melbourne’s nightlife waking up as the sun disappears, taken from St. Kilda Pier. Sky turning pink and lights reflected in the water, St Kilda.
Opportunist Photography ….
- At February 24, 2010
- By thomasjupe
- In Photo Shoot
0
Opportunism
n.
[Cf. F. opportunisme.]
The art or practice of taking advantage of opportunities or circumstances, or of seeking immediate advantage with little regard for ultimate consequences.
I always keep my camera or any camera I can close to hand. You never know when you may need it! This evening while playing around with the HDR automator in Photoshop I heard some fireworks go off. I grabbed my camera and ran outside to see if I could catch them on my new canon 5d. It was a good job I did the fireworks lasted for several minutes allowing me to catch them perfectly.
Living in Val D’isere in the French Alps is a perfect place for me to expand my portfolio with a selection of images that not many photographers can catch. Its a perfect way of showing how my lifestyle helps me with my creativity. Many photographers have studios and a base from which they work where as I travel around and capture as much as I can in several places.
For one of the photos I used the HDR in photoshop. I will write a tutorial of how it works soon but in this instance I don’t think the final image is as good as the one I merged myself in photoshop!
HDR IMAGE
PHOTOSHOPPED IMAGE
When I do photoshop work I have to be quick to keep my productivity high. I like to use big brushes with plenty of feathering to achieve my results. It is easy to become trapped trying to edit one photo to perfection, precisely with pixel to pixel accuracy but often the results are no better, even when zoomed in on that a quick edit! Having a camera which has a larger output is also a great help!
Follow this link to see all my images taken of theVal D’isere Fireworks
Val D’isere Fireworks – Images by Thomas Jupe
.
Funny Shots of Animals
- At February 10, 2010
- By thomasjupe
- In Uncategorized
0
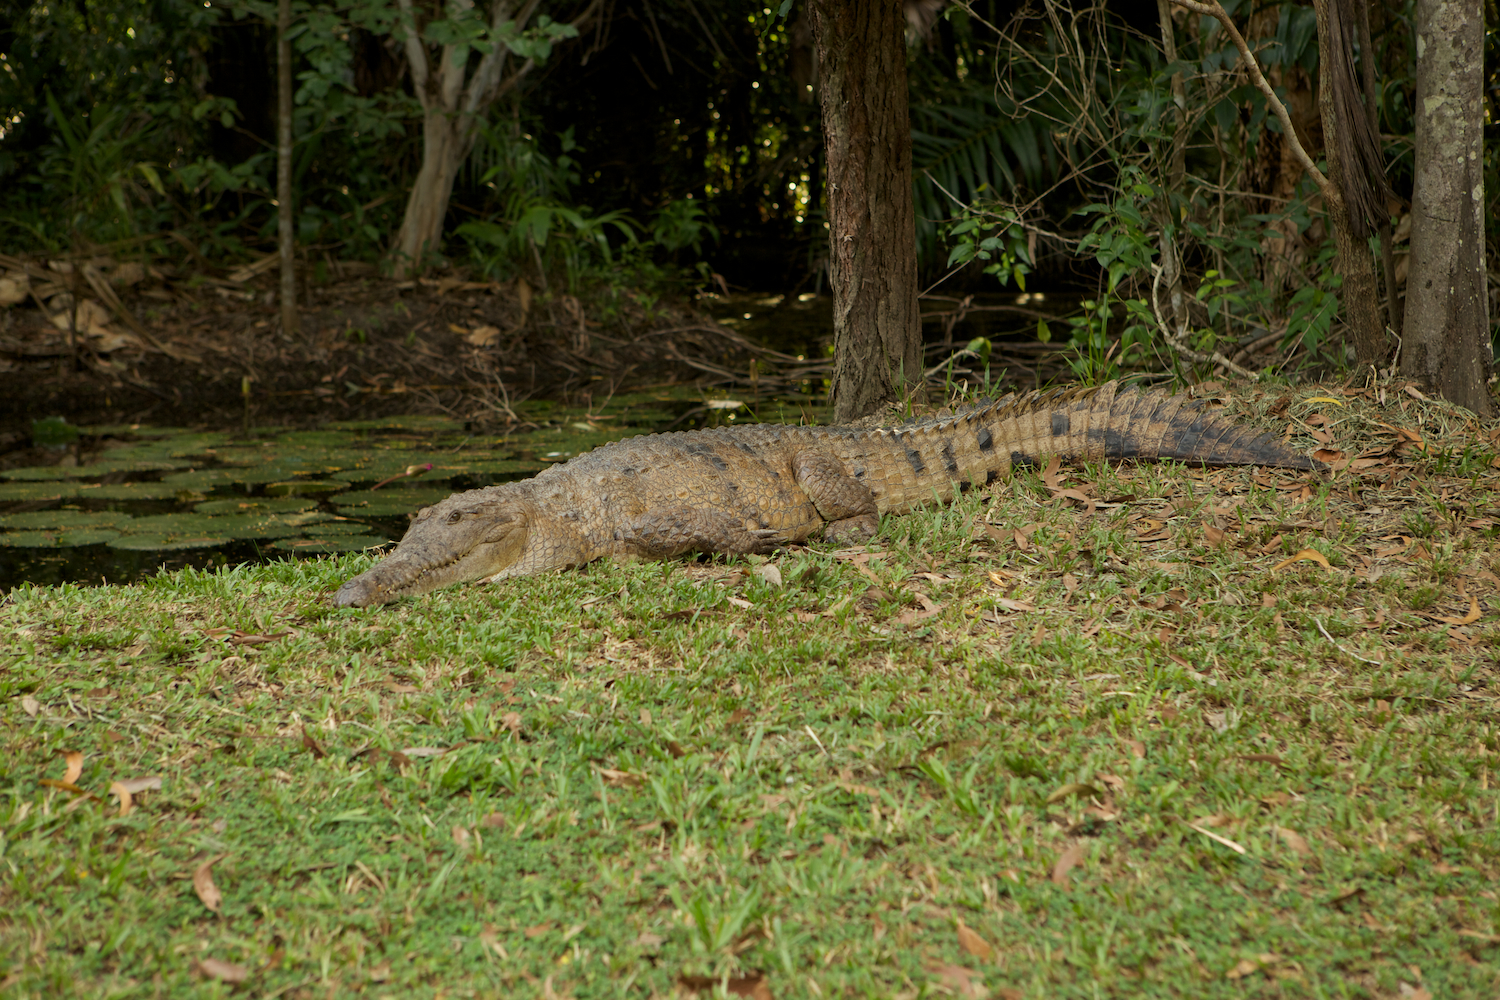
Funny animals at the Zoo – Images by Thomas Jupe
These photos, shot at a wild animal sanctuary & conservation park were a bonus for my catalogue.
It was a day trip planned for my girlfriend earlier last year but I couldn’t resist taking the camera to capture some of the animals characteristics and personalities.
The park is South Lakes animal park in Cumbria it houses many animals from many parts of the world!
The park was an idea created and developed solely by David Gill. At the time of the construction back in 1993/4, he was an animal nutritionist with no connections to zoos, but a desire to see education and conservation brought into the public awareness by the reality of a close, wild experience, an experience for all to react to assist worldwide conservation issues. The then 32-year-old father of two, built the park with his own hands and to this day, still designs and builds all the facilities around the zoo now with the help and assistance of the large staff.
I was touched by the conservation work done by the park and would recommend visiting the park
http://www.wildanimalpark.co.uk/
Wild An
To see my photographs please visit
http://www.photoshelter.com/c/thomasjupe/gallery/Funny-animals-at-the-Zoo/G0000irT9dUnv5vI/
I have uploaded my photos for this album in colour and black and white because I think they look awesome in black and white!
My New Canon 5d
- At February 09, 2010
- By thomasjupe
- In New Uploads, Photo Shoot
2
In the interests of giving my customers the best I decided the other day to get my kit bag up to modern specifications! I had, up to this point been shooting with my trusted companion the Canon 20D but it arrived in the post today. Shipped out to me in Val D’isere my NEW CANON 5D.
Needless to say I was so excited to take it out for a test drive I only had the chance to snap a few un-planned shots! You can see the results below and by visiting my Photoshelter site.


